Shoot iPhone Food Photography Like A Pro - By Skyler Burt
I'm not only thrilled to present Skyler Burt's collection of backdrops, plates & platters, but also his incredible knowledge. Here's a video by Skyler teaching you how easy it is to shoot like a pro using your iPhone:
The plate in the video is called Frostbite and it is oven safe, dishwasher safe, and microwave safe. This texture is also available as a backdrop.
The platter is called Afterglow (and it's also a backdrop) which he set it against the stunning Best Ever Backdrop called Blue Curacao. It is one of eight textures in the Skyler Burt Backdrop Collection. Find it here.
Here is an overview of the food photography tips Skyler suggests:
Food photography using your iPhone, is generally the same as with any other camera. However, the fixed 28mm wide angle lens makes the iPhone less versatile than a tradition camera or dSLR.
Generally, I use either a 50mm or 100mm lens when photographing in front of the food. So for me the wide angle lens of the iPhone makes for a great camera to use when capturing that birds-eye view or flat lay food photography.
TAKING CONTROL OF YOUR SMARTPHONE CAMERA
There are a ton of apps that work to give you more control over your iPhone's camera. My personal favorite is Lightroom mobile.
I think using the Lightroom app for your smartphone food photography makes sense, as this is also the preferred editing software for most everyone.
1. FILE FORMAT
With the Lightroom app you have the option to photograph in DNG or JPEG. DNG is Lightroom's version of RAW files and is higher quality. Allowing you more range to edit your food photography with. Considering the iPhone has only a 12mp camera, I select DNG for the best quality capture.
2. WHITE BALANCE
Select the white balance for the type of light you're photographing your food with. There are options for daylight, tungsten, florescent, cloudy and even a custom setting option. You can also adjust the white balance when editing, in case you forgot when shooting.
3. ISO
One great benefit to using the Lightroom app for your iPhone food photography is the ability to control your ISO. The camera's ISO adjust its sensitivity to light. This often comes at the expense of adding noise in the image. The iPhone's small sensor doesn't handle noise very well. The ability to keep the ISO low (below 100) is fantastic, however this will need longer shutter speeds.
4. SHUTTER SPEED
Having manual control over the shutter speed is a big help when using lower ISO on your iPhone. However, you'll want to use the tripod setup seen in the video to reduce camera shake.

5. MANUAL FOCUS
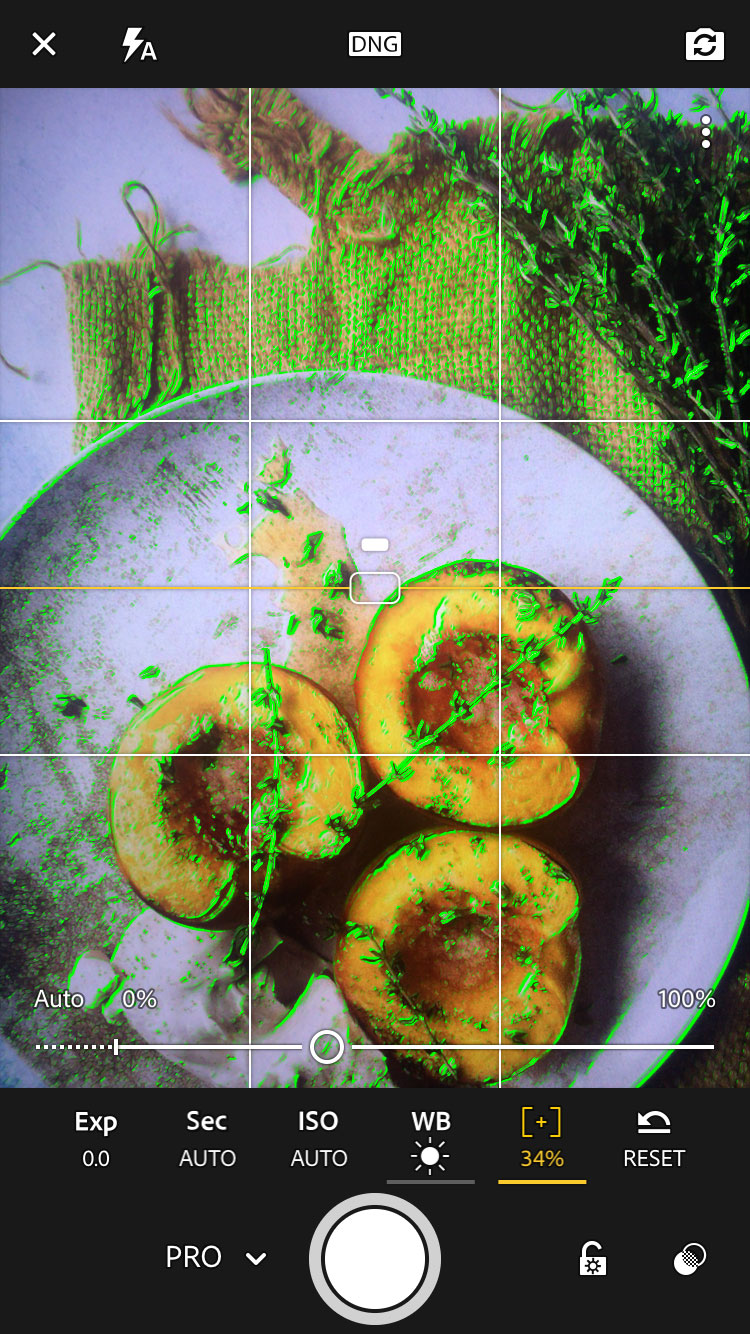
The manual focus option is probably one of the most important features if you're using your iPhone for food photography. Move the slider left or right and the green areas will show you what parts of the image are in focus. Perfect for when critical focus is a must.
MORE FEATURES THAT ARE GREAT FOR IPHONE FOOD PHOTOGRAPHY
6. GRIDS
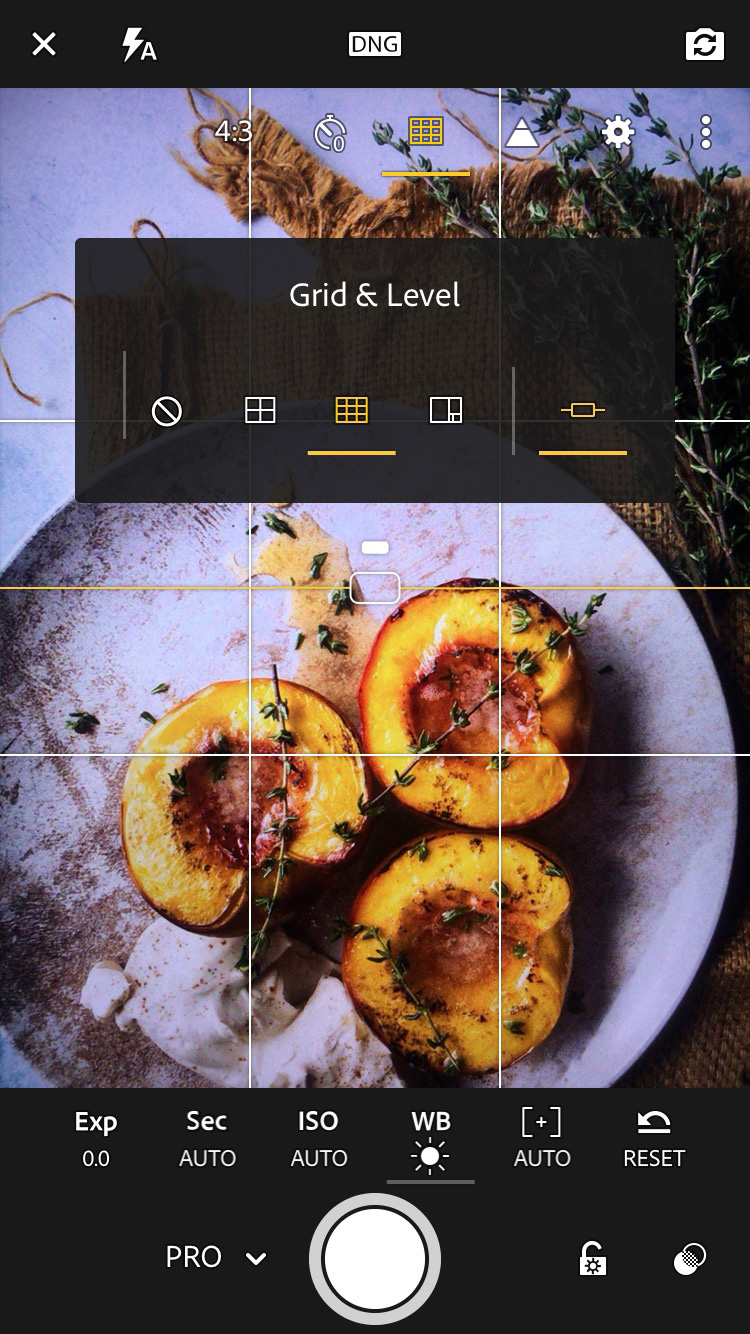
Multiple layouts for having a grid overlay appear over your iPhone camera. I really love using these when composing my smartphone food photography. I use the lines to judge the balance of my compositions. Plus they are perfect for aligning my food photography backdrops and all of my props with the edge of my frame.
7. LEVEL
I find it difficult to keep my iPhone level when shooting flat lay food photography. This level not only works to keep the camera level left to right, but also top to bottom. Having a level image is really important if you want to rotate the image later in editing. Keeping your iPhone level can prevent it appearing as if the props and food are sliding off the table.
8. HIGHLIGHTS CLIPPING
Turn on the highlights clipping mask to alert you when bright areas become over-exposed. Little zebra lines appear, letting you know that you need to dial back the shutter speed, ISO or exposure.
GEAR TO MAKE YOUR IPHONE FOOD PHOTOGRAPHY EASY
9. LIGHTING
You are going to want a lot of light when using your iPhone for food photography. If you're using natural light, try to find a window with direct sunlight coming through.
Then place a large diffusor like this one in between the window and the food (or even a white bed sheet, parchment paper for a budget option).
This will soften down the light while at the same time keeping most of the brightness.
If you're going the artificial route, look for continuous lights that are 60w and above and are easily modifiable with softboxes and grids. I really love these Godox SLB60 for my food photography and videos.
They're bright and the modifiers are inexpensive providing great light year around.
My smartphone food photography camera setup for flat lay images
10. HANDS FREE SHOOTING
Getting your iPhone out of your hands while styling your food photography can be a huge help. It makes the whole process more natural and fluid.
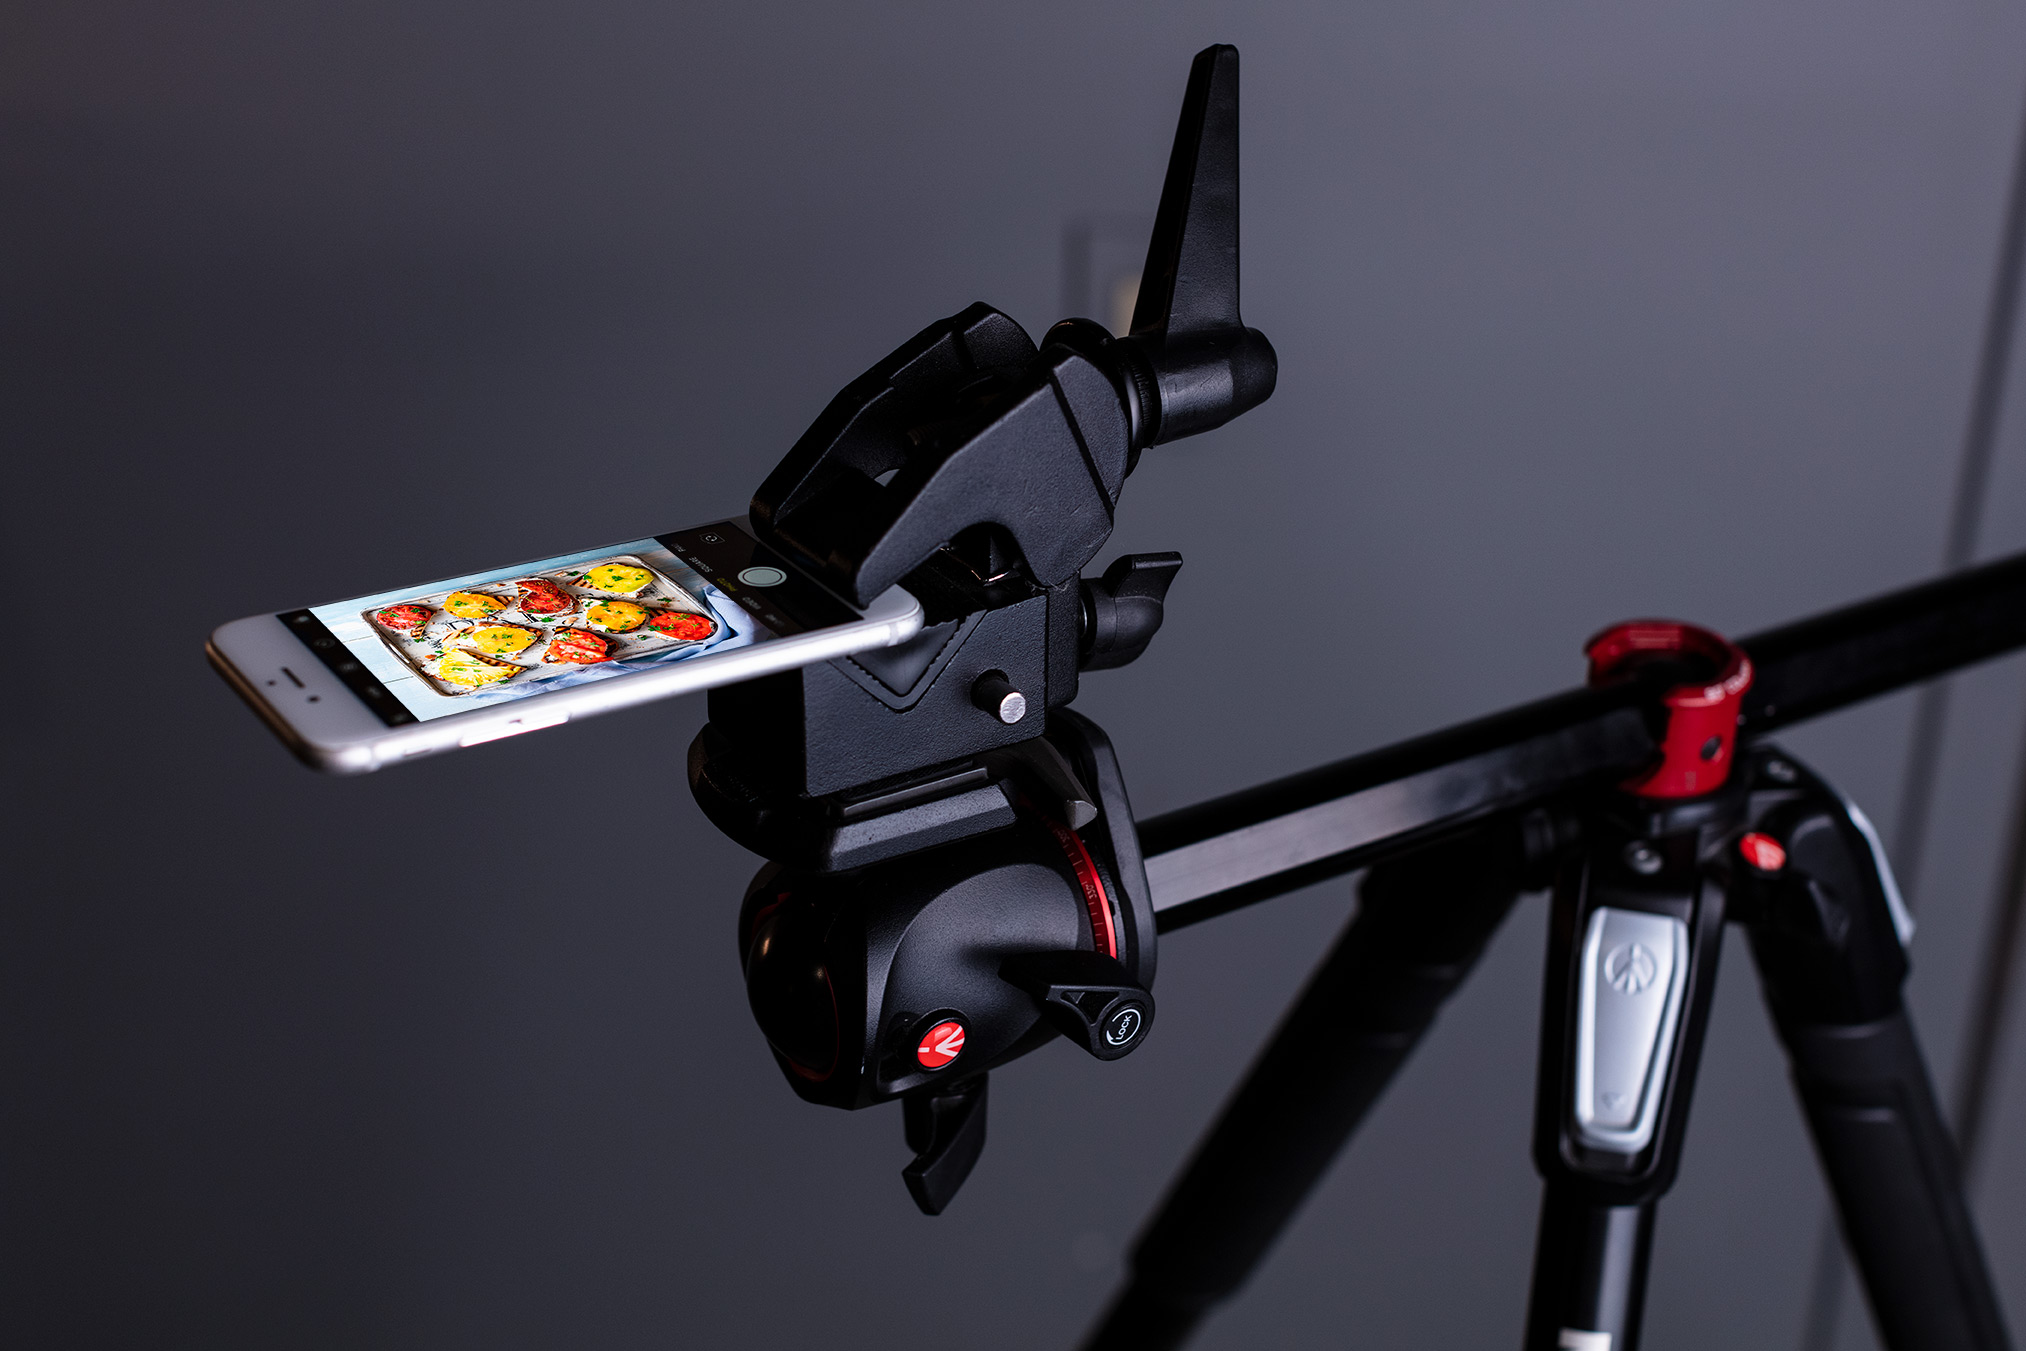
I recommend a tripod that has an adjustable center column. It really helps get the camera out and over the table.
To attach the phone to the tripod, you'll want to pick up one of pick up one of these budget friendly Super Clamps. I use them all around my studio. Be careful not to over tighten, because their grip is strong enough to squeeze your iPhone to death. However, at least you're be sure not to drop your phone into that soup!
To read more tips on How To Shoot Food Photography, visit We Eat Together.
For a 15% discount on any Best Ever Backdrop product, use the promo code SKYBEST15 and share Skyler's link with your friends:
https://besteverbackdrops.com?ref:skyler
Stay tuned for more tips from Skyler on how your shots can become the best ever.


